Easy Hexagon DIY Shoe Rack Ideas
Hexagon DIY shoe rack solutions are often sought when that familiar entryway chaos starts to take over. You know the one – shoes piled precariously, a tangled mess of laces, and the constant hunt for that matching pair when you’re already running late. Sound familiar? Well, imagine transforming that clutter into a chic, modular display that not only organizes your footwear but also adds a touch of modern artistry to your home. This project is surprisingly affordable, often costing under $50, and can be completed in just a weekend afternoon. In this guide, I’ll walk you through exactly how to build your own stylish hexagon shoe rack, step-by-step, so you can finally conquer shoe disarray and create a beautifully organized entryway.
Transform Your Entryway: The Chic and Clever Hexagon DIY Shoe Rack
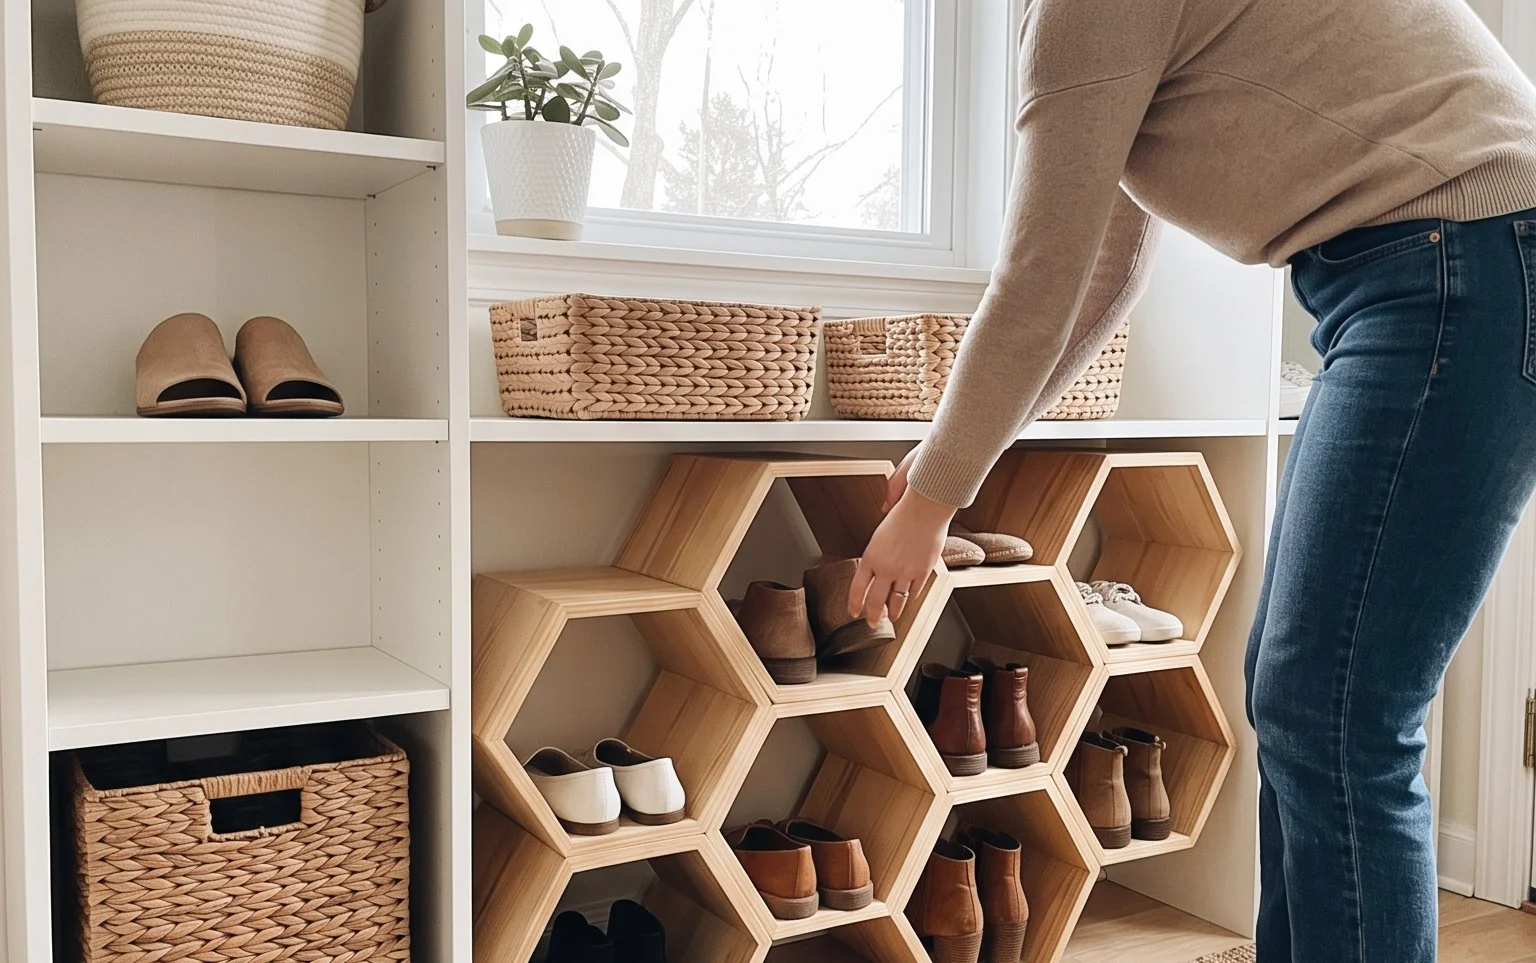
Let’s face it, the entryway is often the first impression our homes make, and a pile of shoes can quickly turn that first impression into a sigh of despair. I’ve been there. The frantic search for a matching pair, the tripping hazard, the sheer visual clutter. It’s enough to make anyone want to shove their shoes into a dark corner and forget about them. But what if I told you there’s a stylish, surprisingly simple, and totally customizable solution you can make yourself? Enter the Hexagon DIY Shoe Rack.
This isn’t your grandma’s clunky shoe cabinet. The honeycomb-inspired design is modern, visually appealing, and incredibly efficient. Each hexagonal cubby is perfectly sized for a pair of shoes, offering a dedicated spot for everything and dramatically reducing clutter. Plus, it’s a fantastic way to flex your DIY muscles without needing a workshop full of tools. Ready to reclaim your entryway and add a touch of bespoke style? Let’s get building.
What You’ll Need and Roughly What It Costs
The beauty of this project lies in its simplicity and affordability. We’re going to be working with plywood, which is readily available, relatively inexpensive, and easy to cut. Here’s a breakdown of what you’ll need:
- Plywood: For a medium-sized rack (around 10-12 hexagons), I recommend a 4ft x 8ft sheet of 1/2 inch or 3/4 inch birch plywood. Birch offers a smooth finish and is less prone to splintering. Expect to spend around $50-$80 for a good quality sheet.
- Saw: A jigsaw or a circular saw will be essential for cutting the plywood. If you don’t own one, consider renting one for a day or see if your local hardware store offers cutting services (though this might incur extra costs per cut).
- Measuring Tape and Pencil: For accurate marking.
- Wood Glue: A strong wood glue is crucial for secure joints. A 16oz bottle should be more than enough, costing around $8-$12.
- Clamps: Several clamps (bar clamps or pipe clamps) are needed to hold the pieces together while the glue dries. You can often find a set of 4 for $30-$50.
- Sandpaper: Various grits (120, 220) for smoothing edges. A pack of assorted grits is usually around $5-$10.
- Optional: Wood Screws (1.25 inch): For added reinforcement, especially if you’re planning a larger rack or anticipate heavy use. A small box will cost about $5-$8.
- Optional: Paint, Stain, or Sealant: To finish your rack. Prices vary wildly, but budget $15-$30.
- Optional: Wall Mounting Hardware (if drilling): Brackets, screws suitable for your wall type. $10-$20.
Rough Total Cost: For a basic, functional rack without fancy finishes, you’re looking at approximately $100-$150. If you already own a saw and clamps, this cost drops significantly.
Measuring and Planning Before You Start
This is perhaps the most important step. A little planning now saves a lot of headaches later. First, assess your space. Where will this shoe rack live? Measure the width, height, and depth of that area. Think about how many pairs of shoes you need to store. A typical adult shoe is roughly 10-12 inches long and 4-5 inches wide. Our hexagons will be internally sized to accommodate this.
Here’s how to plan the hexagon size:
- Inner Width: You want the internal width of each hexagon to be at least 10 inches to comfortably fit most shoes.
- Internal Depth: A depth of 10-12 inches is ideal to prevent shoes from sticking out too far.
- Calculating Plywood Cuts: A hexagon is made of six equilateral triangles. If your *internal* width is 10 inches, then the side length of your equilateral triangle is 10 inches. The width of the plywood piece you cut for each side of the hexagon will be 10 inches. However, you also need to account for the thickness of the plywood when you join the pieces.
- Let’s do the math: If you are using 3/4 inch plywood, and your internal width needs to be 10 inches, then the measurement from the center point of the hexagon to one of its outer points will be approximately 10 inches (this is the height of the equilateral triangle). The actual width of the side panel you cut will be this height plus the thickness of the plywood on either side where it joins another panel. A simpler way to think about this is to cut your side panels to be about 11.5 inches long. Then, when you assemble them, the internal space will be roughly 10 inches. It’s always better to cut a test piece first!
- Number of Hexagons: Decide how many hexagons you want. A common configuration is a cluster of 7 (one central, six surrounding), or a larger arrangement of 12 or more. Sketch it out on paper to visualize the final shape and ensure it fits your dimensions.
The Step-by-Step Build: Bringing Your Hexagon Rack to Life
Now for the fun part! Remember to measure twice and cut once.
- Cut Your Side Panels: Based on your measurements, cut your plywood into equal rectangular pieces. For a 10-inch internal width using 3/4 inch plywood, cut your pieces to approximately 11.5 inches in length. You’ll need six pieces for each hexagon. So, for 12 hexagons, you’ll need 72 pieces.
- Create the Angles: Each side of the hexagon needs to be cut at a 30-degree angle. This is crucial for the pieces to fit together snugly. Set your saw blade to a 30-degree bevel. Cut each end of your 11.5-inch plywood rectangles at a 30-degree angle, ensuring the angles are opposing so that they form a perfect point when two pieces are joined.
- Assemble the First Hexagon: Take six of your angled-cut pieces. Apply a generous amount of wood glue to the angled ends. Fit them together to form a hexagon. Use clamps to hold them tightly. Check that your angles are meeting correctly and the hexagon is forming a flat shape.
- Reinforce (Optional but Recommended): For extra strength, once the glue has set for about 30 minutes, you can add small wood screws. Predrill small pilot holes to prevent the plywood from splitting, then drive in a couple of 1.25-inch screws on each joint.
- Repeat for All Hexagons: Continue this process until you have all your desired hexagons assembled.
- Join the Hexagons: Now it’s time to connect your individual hexagons. Decide on your desired arrangement (e.g., a honeycomb pattern). Apply wood glue to the adjoining edges of two hexagons and clamp them together. You can also screw them together from the inside if you can access it easily.
- Drying Time: Allow all the glue to dry completely according to the manufacturer’s instructions (usually 24 hours for maximum strength).
- Sanding: Once dry, sand all the edges and surfaces smooth. Start with a coarser grit (120) to remove any rough spots and then finish with a finer grit (220) for a silky-smooth finish.
- Finishing: Apply your chosen paint, stain, or sealant. Follow the product’s instructions for application and drying times. Two coats are usually recommended for durability.
- Mounting (if applicable): If you’re mounting your rack to the wall, follow the instructions for your chosen hardware. Ensure it’s securely fastened to wall studs for maximum safety and stability.
Adapting for Small Spaces and Rentals
Living in a smaller apartment or a rental that prohibits drilling doesn’t mean you have to miss out on this stylish shoe storage. Here’s how to adapt:
- Go Vertical: Instead of a wide, sprawling unit, create a taller, narrower configuration. You can stack hexagons vertically, securing them to each other with strong wood glue and perhaps some L-brackets on the *inside* of the unit that are then attached to a separate, freestanding back panel.
- Freestanding Design: Build your hexagon modules and then simply arrange them in your desired configuration on the floor. You can create a tiered effect by placing a smaller cluster on top of a larger one.
- Back Panel: For added stability in a freestanding unit, you can create a simple back panel using a thin piece of MDF or plywood. Cut it to the overall dimensions of your hexagon cluster and attach the hexagons to it using wood glue and screws from the back. This also prevents shoes from falling out the back.
- No-Drill Wall Attachment (for renters): Consider using heavy-duty Command Strips or similar adhesive mounting solutions that are rated for significant weight. Test these thoroughly before fully loading your rack, or use them in conjunction with a freestanding unit that’s simply leaning against the wall.
- Smaller Scale: For very tight spaces, you might only build 3-5 hexagons. These can be arranged as a small, standalone unit or even mounted on a sturdy shelf.
Styling Notes: Beyond Just Storage
This shoe rack is a blank canvas! Think about how to make it a statement piece.
- Color Palette:
- Natural Wood: A clear sealant or light stain lets the beauty of the plywood shine. This is a classic, minimalist look.
- Bold & Bright: Paint the entire rack in a vibrant color to add a pop of personality to your entryway. Think teal, mustard yellow, or a deep emerald green.
- Two-Tone: Paint the outer edges of the hexagons one color and the insides another for added depth and interest.
- Dark & Dramatic: A black or deep charcoal stain can create a sophisticated, modern feel.
- Texture:
- Wood Grain: If you use a stain, embrace the natural wood grain.
- Painted Finish: Opt for a matte, satin, or even a high-gloss finish depending on your desired aesthetic.
- Adding Accents: You could even line the back of a few cubbies with decorative wallpaper or fabric for an unexpected touch.
- What to Put Where:
- Shoes, of course! Aim to have one pair per cubby. This keeps things organized and prevents overcrowding.
- Heels vs. Flats: Place taller heels in cubbies where the top can accommodate them, and flats or sandals in shallower ones.
- Kids’ Shoes: Smaller cubbies are perfect for children’s shoes.
- Beyond Shoes: Don’t be afraid to repurpose a few cubbies. They can hold neatly folded scarves, gloves, hats, small baskets for keys and mail, or even a potted plant for a touch of greenery.
- Aesthetic Arrangement: Try to group similar types of shoes together or create visual balance by placing heavier items lower down and lighter items higher up.
Keeping it Tidy After Week One
The initial week will be glorious! Everything is perfectly in place. But the real test is maintaining that order. Here’s how:
- The “One In, One Out” Rule: When a new pair of shoes comes in, an old one needs to go out (donate, recycle, or discard). This prevents overflow.
- Daily Sweep: Take 60 seconds each day to ensure shoes are neatly placed within their designated cubby. If a shoe is kicked off, put it away immediately.
- Weekly Reset: Once a week, take everything out of the rack. Give the rack a quick dusting. Wipe down any scuffs on the shoes. Reorganize as needed. This is also a good time to check for any items that don’t belong (e.g., stray umbrellas, shopping bags).
- Designated “Out” Spot: Have a small basket or tray nearby for shoes that are dirty or wet and need to be cleaned before being put away.
- Family Chore: If you live with others, make sure everyone understands the system and their role in maintaining it.
The Mistakes That Make This Fail
Even the most stylish DIY project can go awry. Here are the common pitfalls to avoid:
- Inaccurate Measurements: This is the number one killer of DIY projects. If your angles aren’t right, your hexagons won’t fit together, leading to gaps, weak joints, and a crooked final product. Double-check everything!
- Skipping the Glue: While screws add strength, wood glue is what creates a solid, monolithic structure. Don’t skimp on it.
- Rushing the Drying Time: Be patient. Letting the glue cure fully is essential for structural integrity.
- Overcrowding Cubbies: Trying to cram two pairs of chunky boots into one hexagon will inevitably lead to shoes falling out and the rack looking messy. Stick to one pair per cubby.
- Ignoring Wall Stability: If you’re mounting it, make sure you’re using appropriate anchors and finding studs. A falling shoe rack is a hazard, not a design feature.
- Forgetting About Weight: Heavy boots and winter shoes will put more strain on the structure. Consider reinforcing those cubbies with extra screws or using thicker plywood if you anticipate storing a lot of heavy footwear.
- Neglecting Maintenance: A beautiful rack is still just a piece of furniture. Without a little upkeep, it will quickly revert to chaos.
Building your own hexagon shoe rack is a rewarding project that offers both functional storage and a touch of modern artistry to your home. With careful planning and a bit of elbow grease, you’ll have a stylish and organized entryway that you’ll be proud to show off.
Conclusion
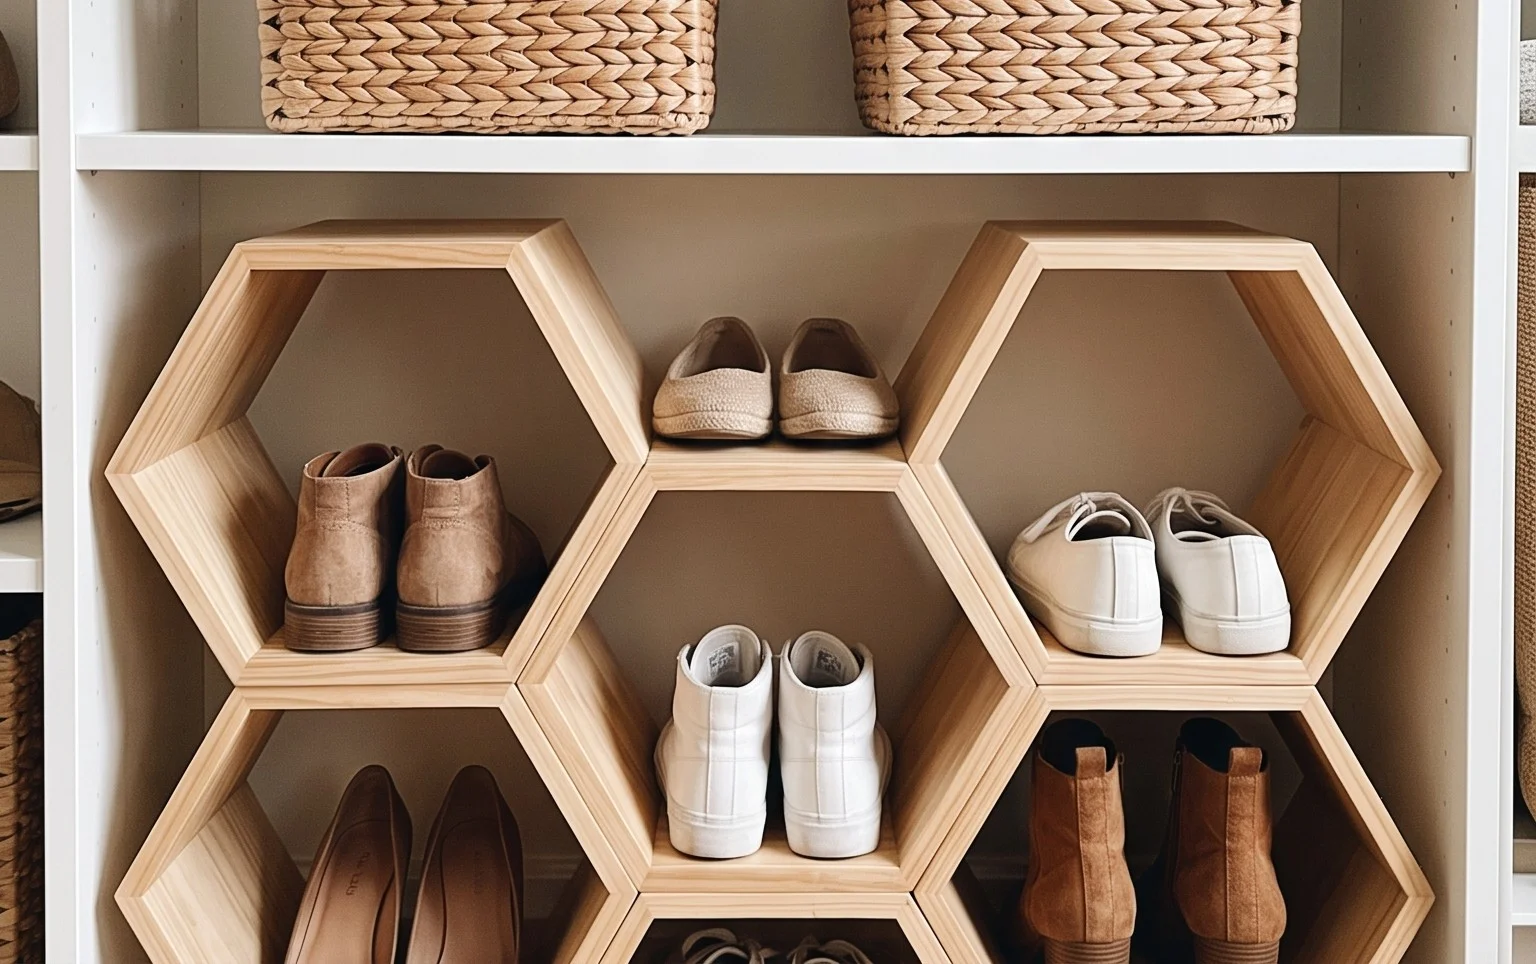
Imagine the sheer relief of a tidy entryway, the ease of finding your perfect pair every morning. This hexagon DIY shoe rack isn’t just about looks; it’s about reclaiming your space and simplifying your daily routine. The difference it makes, from the moment you walk in the door, is truly transformative.
Ready to start? Your smallest first step is to gather a few old cardboard boxes and a bit of tape. You can create a mini version right now to see how it feels!
For a different touch, consider using repurposed wood scraps for a rustic feel in a mudroom, or paint smaller hexagonal modules in vibrant colors for a playful kids’ room organizer.
We hope this hexagon DIY shoe rack inspires you to tackle your entryway organization. Keep exploring our ideas for more home decor and organization solutions!