Easy DIY Fall Candles: Essential Oil Recipes
DIY Fall Candles with Essential Oils are the perfect antidote to that lingering, stuffy indoor scent and the drabness that creeps into our homes as the days shorten. Does your entryway sometimes smell a little… uninspired? Or perhaps your living room feels like it needs a cozy hug? Imagine stepping into your home and being greeted by the warm, inviting aromas of spiced apple, crisp pine, or a hint of sweet pumpkin, all from beautifully flickering, handcrafted candles. For a fraction of the cost of store-bought alternatives and taking only about 30 minutes per candle, you can transform your space. In this article, I’ll guide you through seven delightful recipes, showing you how to select the right waxes and essential oils, how to safely melt and pour, and how to create truly personalized scents that will make your home feel like a cozy autumn retreat.
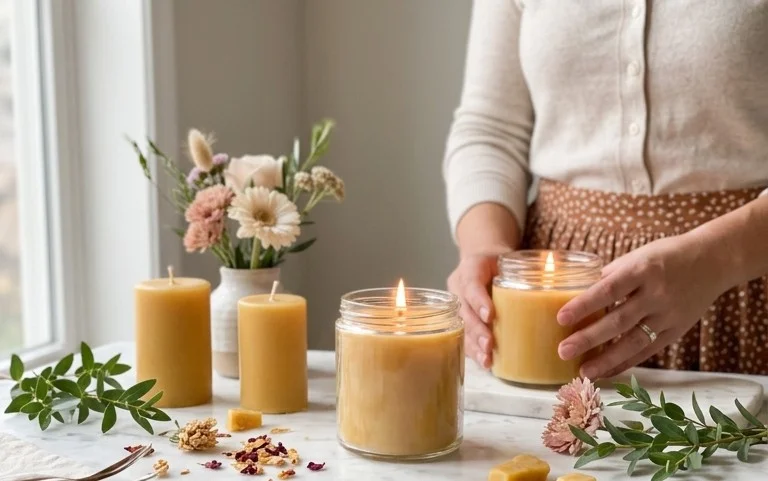
Embrace the Cozy: Craft Your Own DIY Fall Candles with Essential Oils
As the leaves begin to turn and a crispness fills the air, there’s a certain magic to fall. It’s a season that begs for warmth, comfort, and a touch of hygge. And what better way to usher in that feeling than by filling your home with the enchanting aromas of autumn, all while immersing yourself in a satisfying DIY project? Making your own fall-scented candles with essential oils is surprisingly accessible, budget-friendly, and incredibly rewarding. Forget those expensive store-bought options; we’re going to create bespoke scents that perfectly capture the essence of fall.
Why DIY Candles with Essential Oils?
Beyond the sheer joy of creation and the delightful aroma, choosing essential oils over synthetic fragrance oils is a game-changer. Pure essential oils offer a more natural, nuanced scent profile, and many are believed to have therapeutic benefits. Plus, you have complete control over the ingredients, avoiding potential irritants often found in commercial candles.
Getting Started: What You’ll Need and Rough Costs
Embarking on your candle-making adventure is simpler and more affordable than you might think. Here’s a breakdown of what you’ll need and an estimated cost. Prices are approximate and can vary based on brands and retailers.
* **Soy Wax Flakes:** (Approx. 1-2 lbs, enough for 4-6 standard candles) – $10-$20. Soy wax is a popular choice for its clean burn and biodegradability.
* **Candle Wicks with Metal Tabs:** (Pack of 10-20) – $5-$10. Ensure they’re the right size for your containers; too small and they’ll tunnel, too big and they’ll create excess soot.
* **Wick Stickers or Hot Glue Gun:** (For securing wicks) – $3-$5.
* **Pouring Pot or Double Boiler Setup:** You can buy a dedicated pouring pot (around $10-$20) or use a heat-safe bowl over a pot of simmering water.
* **Thermometer:** A candy or digital thermometer is essential for accurate temperature readings – $5-$15.
* **Stirring Utensils:** Wooden spoons or silicone spatulas you don’t mind dedicating to crafting.
* **Essential Oils:** This is where the magic happens! A good starting point might be:
* Cinnamon Bark or Cassia essential oil (adds warmth) – $10-$25 per 15ml.
* Clove Bud essential oil (spicy and grounding) – $8-$18 per 15ml.
* Orange Sweet essential oil (bright and cheerful) – $5-$15 per 15ml.
* Nutmeg essential oil (warm and comforting) – $12-$28 per 15ml.
* Ginger essential oil (zesty and invigorating) – $10-$25 per 15ml.
* Cedarwood essential oil (woody and grounding) – $8-$20 per 15ml.
* Patchouli essential oil (earthy and musky) – $6-$18 per 15ml.
* For a beginner set, budgeting around $50-$100 for a few key oils will give you plenty of blending options.
* **Containers:** Repurposed jars, teacups, small ceramic bowls, or dedicated candle tins – $0 (if repurposing) to $20+ for specialized vessels.
* **Optional:** Dried orange slices, cinnamon sticks, star anise for decoration (use sparingly and away from the flame).
**Total Estimated Cost:** $30 – $100+ depending on your essential oil choices and container sourcing.
Measuring and Planning: Setting Yourself Up for Success
Before you melt a single flake of wax, a little planning goes a long way.
1. **Container Size:** Measure the diameter and depth of your chosen containers. This will help you estimate how much wax you need and, crucially, which wick size is appropriate. Wick manufacturers usually provide a guide based on container diameter.
2. **Wax Quantity:** A general rule of thumb is that 1 pound of soy wax flakes yields approximately 20 fluid ounces of melted wax. For example, a 6-ounce jar will need roughly 6 ounces of melted wax. It’s always better to make a little extra than to run short.
3. **Essential Oil Ratio:** A good starting point for essential oils in soy wax is a 6-10% fragrance load. This means for every 16 ounces (1 pound) of wax, you’ll use 1-1.6 ounces (28-45 grams) of essential oils. For smaller batches, calculate proportionally. For instance, in 8 ounces of wax, aim for 0.5-0.8 ounces of essential oils. Too little and the scent will be faint; too much can affect the burn quality.
4. **Scent Blends:** This is the fun part! Think about the aromas that evoke fall for you. Here are seven recipe ideas to get you started:
* **Pumpkin Spice Delight:** 4 parts Cinnamon Bark, 2 parts Clove Bud, 1 part Nutmeg, 1 part Orange Sweet.
* **Orchard Harvest:** 3 parts Orange Sweet, 2 parts Cinnamon Bark, 1 part Ginger.
* **Cozy Fireside:** 4 parts Cedarwood, 2 parts Patchouli, 1 part Clove Bud.
* **Spiced Apple Crumble:** 3 parts Cinnamon Bark, 2 parts Orange Sweet, 1 part Clove Bud, 1 part Nutmeg.
* **Earthy Woods:** 4 parts Cedarwood, 3 parts Patchouli.
* **Cinnamon Hearth:** 5 parts Cinnamon Bark, 2 parts Clove Bud.
* **Sweet Orange & Spice:** 4 parts Orange Sweet, 3 parts Cinnamon Bark.
*(Note: “Parts” here are for ratio purposes. If you decide to use grams, for example, you’d maintain these proportions. For an 8oz batch using a 7% fragrance load, that’s roughly 0.56oz or 16 grams of essential oils total. You would divide that 16 grams according to your chosen ratio.)*
The Candle-Making Process: A Step-by-Step Walkthrough
Now, let’s get our hands a little waxy!
1. **Prepare Your Containers:** Ensure your containers are clean and dry. Place a wick sticker on the bottom of your wick tab and adhere it to the center of the container’s base. Alternatively, use a small dab of hot glue.
2. **Secure the Wicks:** Use a clothespin, pencil, or specialized wick centering tool to hold the wick upright and centered at the top of the container.
3. **Melt the Wax:**
* If using a double boiler, fill the bottom pot with about 1-2 inches of water and bring it to a gentle simmer.
* Place your soy wax flakes into the pouring pot or the heat-safe bowl.
* Carefully place the pouring pot/bowl over the simmering water, ensuring the water doesn’t splash into the wax.
* Stir the wax occasionally as it melts.
4. **Monitor the Temperature:** Use your thermometer to track the wax temperature. Soy wax typically melts around 120-180°F (49-82°C). You’ll want to bring it up to around 180-185°F (82-85°C) to ensure it’s fully melted and ready to incorporate essential oils.
5. **Add Essential Oils:** Once the wax reaches the target temperature (around 180-185°F or 82-85°C), remove it from the heat. Allow the wax to cool slightly to about 130-135°F (54-57°C) before adding your essential oils. This temperature is crucial; too hot and the oils will evaporate, too cool and they won’t bind properly with the wax. Stir gently for at least 1-2 minutes to ensure the oils are thoroughly dispersed.
6. **Pour the Wax:** Carefully and slowly pour the scented wax into your prepared containers. Avoid splashing, as this can create air bubbles. Leave about half an inch of space at the top.
7. **Allow to Cure:** Let your candles cool completely undisturbed for at least 24 hours. This curing time is vital for the scent throw to develop. Some candle makers even recommend a longer cure of 1-2 weeks for optimal fragrance release.
8. **Trim the Wicks:** Once fully hardened, trim the wick to about ¼ inch.
Adapting for Small Spaces and Rentals
The beauty of DIY candles is their adaptability!
* **Small Spaces:** Opt for smaller containers like teacups or mini jars. These burn faster, so you can enjoy a variety of scents without them taking up too much real estate. Grouping a few small candles can create a lovely focal point.
* **Rentals (No Drilling/Permanent Changes):** This is where jars and tins shine! They are freestanding and require no attachment to walls or furniture. If you want to hang decorative elements, consider using temporary adhesive hooks (ensure they are suitable for the surface and remove cleanly). You can also place candles on trays or decorative plates, which can be easily moved and offer a protective layer for surfaces.
Styling Notes: Where to Place Your Fall Creations
Once your candles are ready, it’s time to integrate them into your decor.
* **Color Palette:** Embrace warm, earthy tones. Think burnt oranges, deep reds, mustard yellows, and rich browns. The candle itself can complement this palette. For example, a candle with a naturally golden hue from soy wax is perfect.
* **Texture:** Layering textures is key to a cozy fall feel. Place your candles on wooden trays, woven placemats, or amongst chunky knit throws. Dried leaves, pinecones (ensure they are treated to be fire-safe or used well away from the flame), or small gourds can create charming vignettes.
* **Placement:**
* **Living Room:** Group a few candles on a coffee table for a warm glow during movie nights. Place one on an entryway table to welcome guests with inviting aromas.
* **Kitchen:** A small candle on the counter can make cooking feel more festive.
* **Bedroom:** A single, subtle-scented candle on a nightstand can promote relaxation.
* **Bathroom:** Light a candle during a relaxing bath for an extra touch of luxury.
* **In Use Styling:** As the candle burns, the wax will melt and pool. This is natural and beautiful! Arrange any decorative elements (dried orange slices, cinnamon sticks) *around* the base of the candle, never directly on top where they could catch fire. If you’ve added physical decorations to the candle itself (like embedding a cinnamon stick *into* the wax away from the wick), ensure it’s far enough from the flame to be safe. The melted wax creates a lovely, soft glow.
Keeping It Tidy After Week One
Maintaining the beauty and function of your handmade candles is easy.
* **Wick Trimming:** Before each burn, trim the wick to ¼ inch. This prevents sooting and ensures a cleaner, more even burn.
* **Tunnelling Prevention:** The first burn is crucial. Allow the candle to burn long enough for the wax pool to reach the edges of the container (usually 2-4 hours for a standard jar). This prevents “tunneling,” where the wick burns down the center, leaving a significant amount of wax on the sides.
* **Dusting:** Gently dust your candles with a soft cloth when they are not in use.
* **Keeping Containers Clean:** If you repurpose jars, ensure they are thoroughly cleaned and any labels removed.
Common Mistakes That Make This Fail
Even the most enthusiastic crafter can encounter pitfalls. Here are a few to watch out for:
* **Incorrect Wick Size:** As mentioned, using the wrong wick is a common culprit for poor burning. It’s worth investing a little time to ensure you have the right size for your container.
* **Overheating Essential Oils:** Adding essential oils when the wax is too hot will cause them to evaporate, leading to a weak scent. Always wait until the wax has cooled to the recommended temperature.
* **Not Stirring Enough:** Insufficient stirring means the essential oils won’t be evenly dispersed throughout the wax, resulting in an inconsistent scent throw. Stir thoroughly for at least a minute.
* **Ignoring the Cure Time:** Patience is key! While you can burn your candle after 24 hours, allowing it to cure for a week or two will significantly improve the scent throw.
* **Adding Too Much Essential Oil:** While it seems counterintuitive, overloading your wax with fragrance can lead to sweating (oily residue on the candle surface) and a sooty, uneven burn. Stick to the recommended fragrance load.
* **Not Securing the Wick Properly:** A wobbly wick will lead to an uneven burn and potentially a messy melt pool. Make sure it’s centered and secure.
Making your own fall candles is a wonderfully tactile and aromatic way to celebrate the season. With a little preparation and these simple steps, you’ll be filling your home with the comforting scents of autumn, one beautiful, handmade candle at a time. Happy crafting!
Conclusion
Incorporating these DIY Fall Candles with Essential Oils into your home is more than just a craft; it’s a simple yet profound way to elevate your everyday. Imagine returning home to the comforting embrace of cinnamon spice or the refreshing zest of citrus – these scents truly transform the atmosphere and your mood. For your smallest first step today, try just one simple recipe using oils you already have! If you’re looking to switch things up, consider a cozy lavender blend for the bedroom, or a vibrant orange and clove combination for the kitchen that’s budget-friendly and energizing.
Explore more
We hope these recipes inspire your autumn decorating. Feel free to experiment and discover your own signature fall scents. There are always more delightful DIY home decor and organization ideas waiting to be explored!
