Ikea Kallax Alex Craft Room: Easy Design Ideas
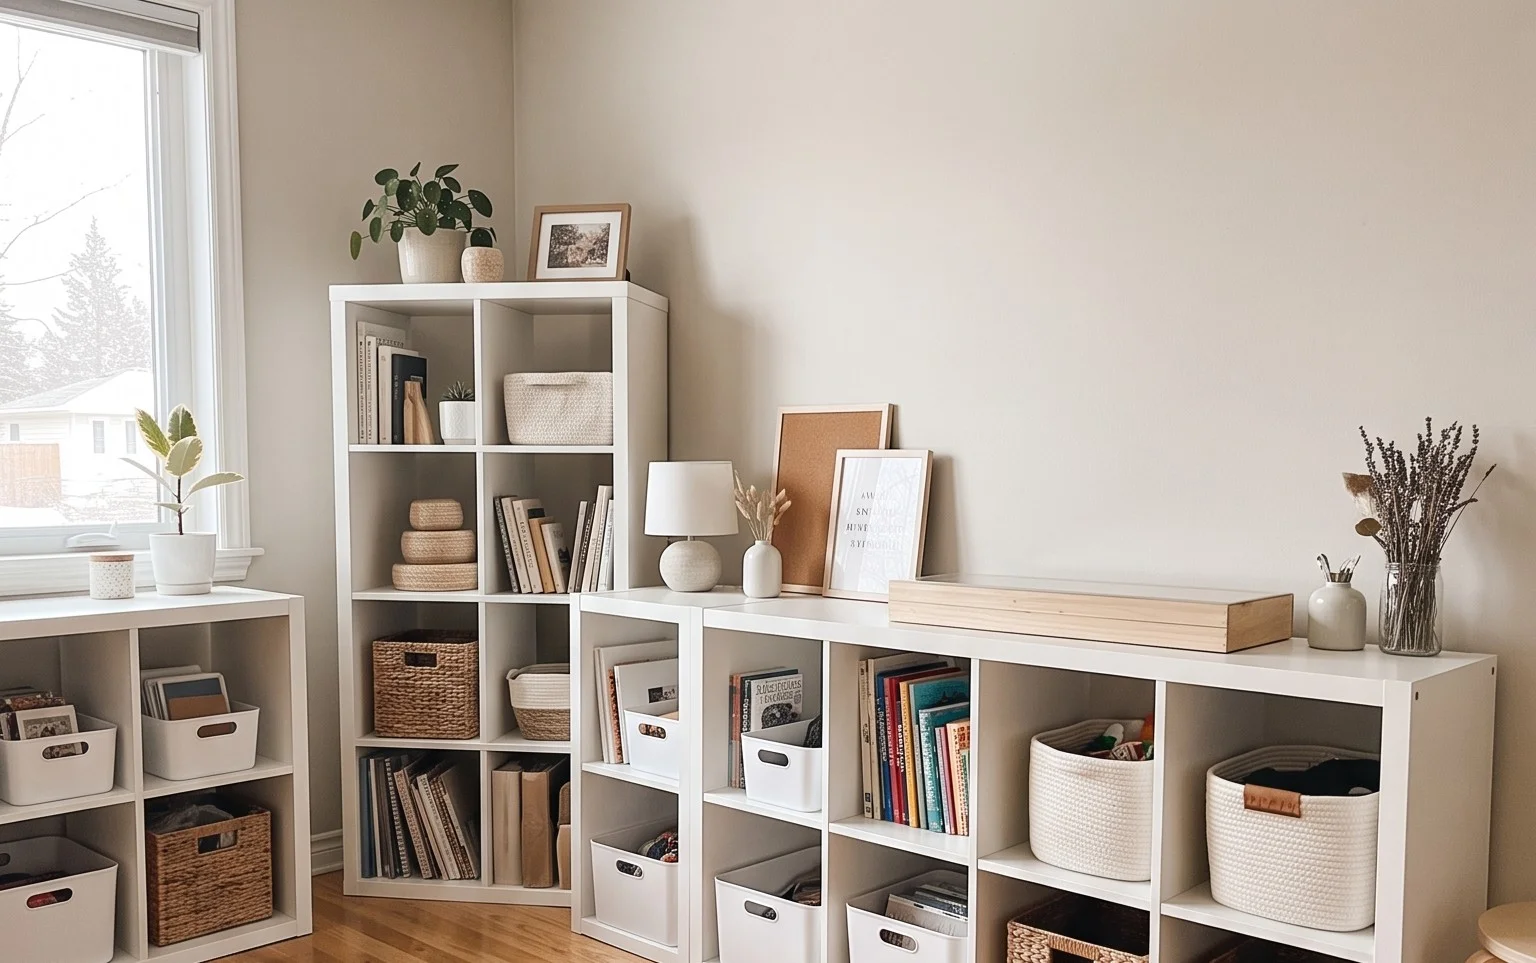
Designing my Ikea Kallax and Alex craft room has been a game-changer for my creative chaos! If you’re like me, and your crafting supplies are staging a hostile takeover of your living space, spilling out of drawers and threatening to bury your workspace, then you know the everyday frustration. You’re not alone! After seeing my piles of fabric, yarn, and art supplies take over my apartment, I knew it was time for a system. My finished craft room is a haven of organized bliss, where everything has its place. The sleek white Kallax units hold my supplies neatly, while the Alex drawers keep my tools at my fingertips. It’s bright, functional, and inspires me to create. This project cost me around $300 and took a weekend to assemble and organize. In this article, I’ll share exactly how I transformed my space, what I learned about maximizing Ikea’s genius designs, and how you can create your own dream craft room on a budget.
Designing My Ikea Kallax and Alex Craft Room
Turning a spare room, or even a corner of one, into a dedicated craft space can be a game-changer for creativity and productivity. For me, the dream was always a bright, organized haven where supplies were easily accessible and inspiration was just a glance away. After much research and a bit of trial and error, I landed on the iconic Ikea Kallax and Alex combination. It’s budget-friendly, highly customizable, and frankly, a crafting rite of passage. Let’s dive into how I brought my Ikea Kallax and Alex craft room to life.
What You Need & Roughly What It Costs
The beauty of the Kallax and Alex system is its modularity and affordability. Here’s a breakdown of what I ended up with and the approximate costs. Prices are based on typical UK Ikea pricing and can fluctuate.
* **Ikea Kallax Shelving Units:** I opted for two 4×2 Kallax units (approximately £60 each) and one 1×4 Kallax unit (approximately £30). This gave me a good amount of horizontal and vertical storage. Total for Kallax: £150.
* **Ikea Alex Drawer Units:** I needed serious drawer space for smaller bits and bobs. Two Alex 5-drawer units (approximately £95 each) were perfect. Total for Alex: £190.
* **Kallax Inserts:** This is where personalization comes in. I purchased a mix of:
* Dörna drawers (fabric boxes, approximately £8 for a pack of two) – 4 packs: £32
* KALLAX shelves for dividers (approx. £10 each) – 2 units: £20
* Door inserts (approx. £15 each) – 2 units: £30
* **Desktop Surface:** To create a cohesive workspace, I used a long Ikea Gerton oak veneer countertop (approximately £70) and cut it to size.
* **Legs/Supports for Desktop:** Simple Capita stainless steel legs (approx. £20 for a pack of 4) to elevate the countertop.
* **Miscellaneous Hardware:** Screws, wall anchors (if applicable), and potential L-brackets for securing if needed. Budget around £30 for this.
**Rough Total Cost:** £522. This is a significant investment, but considering the functionality and the fact that these pieces are built to last and can be reconfigured, I felt it was well worth it.
Measurements and Planning Before You Start
Before I even set foot in Ikea, I spent a good weekend measuring my designated craft space. This is crucial to avoid buyer’s remorse or having pieces that don’t fit.
* **Measure Your Space:** I measured the width, depth, and height of the wall I intended to use. I also noted the placement of windows, doors, and any power outlets. My chosen wall was 3 meters wide and 2.5 meters high.
* **Consider Your Needs:** What kind of crafting do I do? I’m a mixed-media artist, so I have a lot of paints, inks, papers, yarn, and smaller tools. This dictated the need for both open shelving and drawers.
* **Sketch It Out:** I drew a rough floor plan of the room and then sketched out different configurations of the Kallax and Alex units. I considered:
* **Desk placement:** Should it be integrated or a separate piece?
* **Workflow:** How do I move around the space? I wanted easy access to supplies while sitting at my desk.
* **Visual balance:** How would the heights and widths of the units work together?
* **Kallax Dimensions:** I familiarized myself with the exact dimensions of the Kallax units I was considering. A 4×2 Kallax is 77×147 cm, and a 1×4 is 42×147 cm. An Alex drawer unit is typically around 36×70 cm. This helped me visualize how they’d fit against my wall and form a desk. My plan was to have the two 4×2 units flanking the desk area, with the 1×4 unit acting as a shorter, accessible storage piece to the side.
The Walkthrough: Building My Craft Room
This is a simplified, numbered walkthrough of how I assembled and configured my Kallax and Alex units.
1. **Assemble the Kallax Units:** Follow the standard Ikea instructions. This involves laying out the panels, inserting dowels, and screwing the sides together. Take your time to ensure all connections are secure. I did this for the two 4×2 units first.
2. **Assemble the Alex Drawer Units:** Again, follow Ikea’s clear instructions. The most time-consuming part here is often attaching the drawer runners. Make sure they are level for smooth operation.
3. **Position the Large Kallax Units:** Place the two 4×2 Kallax units where you envision them forming the base of your desk. I positioned them about 1.5 meters apart.
4. **Position the Alex Drawer Units:** Slide the Alex units in between the Kallax units, or to the sides, depending on your desired desk configuration. I chose to place one Alex unit on each side, tucked against the Kallax units, to create a generous desk width.
5. **Cut and Attach the Desktop:** If using a longer countertop like the Gerton, measure and cut it to your desired desk length. I opted for a 1.5-meter desktop, which fit perfectly between the two 4×2 Kallax units. I then attached the Capita legs to the underside of the countertop at each corner and the center for support.
6. **Place the Desktop:** Carefully lift and place the desktop onto the Kallax and Alex units. Ensure it’s level and sits flush.
7. **Assemble and Place the 1×4 Kallax:** Assemble the smaller Kallax unit and place it in its designated spot. I put mine to the side of the desk area as a lower storage solution.
8. **Install Kallax Inserts:** Now for the fun part! Insert your chosen drawers, doors, or shelves into the Kallax cubes.
9. **Secure (If Possible):** If you are in a permanent home and able to drill, Ikea provides wall anchoring kits for Kallax units. I highly recommend using these for safety, especially for taller units.
Adapting for Small Spaces or Rentals
This is where the Kallax and Alex shine!
* **Small Space Solutions:**
* **Verticality:** Use taller Kallax units (e.g., 5×1 or 4×1) to maximize vertical space.
* **Desk Integration:** A single Kallax unit can serve as the base for a floating desk if space is extremely limited.
* **Under-Desk Storage:** Alex drawer units fit perfectly under most standard desks.
* **Corner Solutions:** L-shaped Kallax configurations can cleverly utilize awkward corner spaces.
* **Rental Adaptations (No Drilling):**
* **Weight Distribution:** Ensure units are placed on a level floor and are not overloaded.
* **Heavy-Duty Command Strips:** For lighter items, consider heavy-duty Command strips for securing decorative elements or very light accessories.
* **Freestanding is Key:** Rely on the inherent stability of the units. The Kallax units are quite stable on their own, especially when filled.
* **Desk Support:** Use sturdy table legs or desk frames that are not attached to the wall if you’re creating a separate desk area. For the Kallax/Alex desk, the weight of the Kallax units and the countertop provides good stability.
Styling Notes: Making it Look Good
A functional craft room doesn’t have to be an eyesore. Here’s how I made mine both practical and pleasing to the eye.
* **Colour Palette:** I opted for a neutral base of white for the Kallax and Alex units, which makes the space feel brighter and larger. I then introduced colour through my craft supplies, storage boxes, and a few decorative accents.
* **Texture:** To avoid a sterile feel, I mixed in natural textures.
* **Wood:** The oak veneer Gerton countertop adds warmth.
* **Fabric:** Fabric storage boxes (like the Dörna inserts) add a softer touch.
* **Woven Baskets:** I used a couple of small woven baskets on open shelves for a natural, bohemian vibe.
* **What to Put Where:** This is all about optimizing workflow and visual appeal.
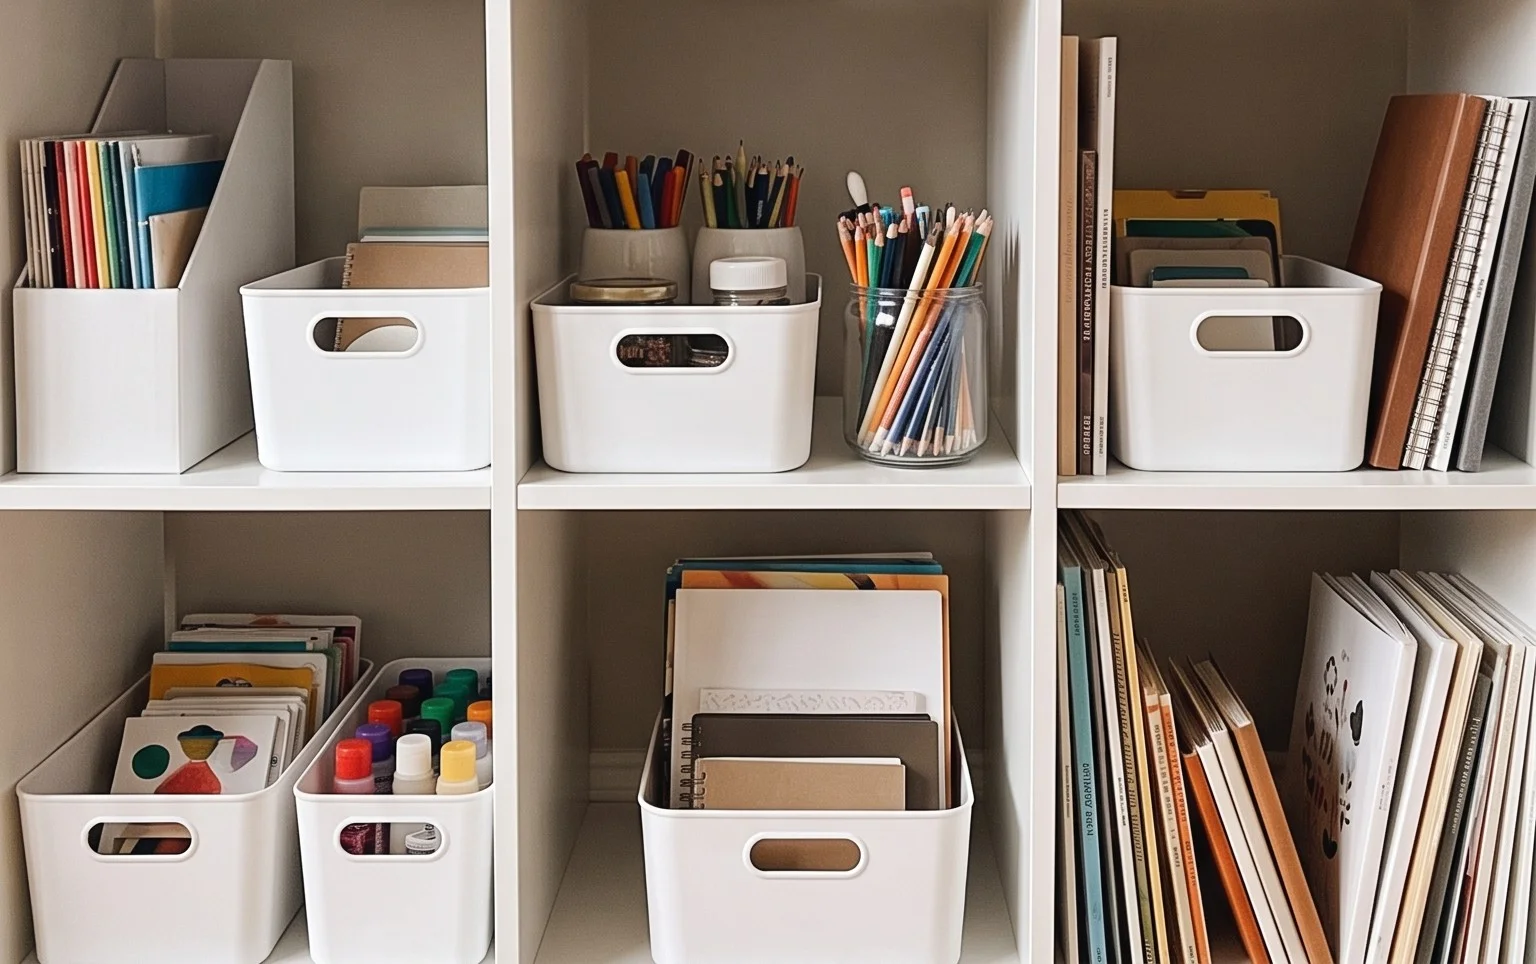
* **Open Kallax Cubes:** These are for frequently used items or display. I have art books, jars of brushes, and some decorative plant pots here.
* **Kallax Drawers/Doors:** These hide away less attractive but essential items like bulk paper, fabric scraps, or unfinished projects.
* **Alex Drawers:** The deep drawers are perfect for organizing smaller craft supplies like pens, pencils, markers, threads, beads, and smaller tools. I labelled mine clearly.
* **Desk Surface:** Keep this as clear as possible for actual crafting. A lamp, a small tray for current project tools, and perhaps a small plant are all you need.
Keeping It Tidy After Week One
The honeymoon phase of a new craft room is glorious, but the clutter will creep in. Here’s my strategy for long-term tidiness.
* **The “One In, One Out” Rule (for supplies):** When a new supply comes in, an old one should ideally go. This prevents overwhelming the storage.
* **Daily Tidy-Up (5 Minutes):** Before I finish crafting for the day, I spend 5 minutes putting things back where they belong. Pens in their jars, scraps in their designated bins.
* **Weekly Reset (15 Minutes):** On a Friday afternoon, I do a slightly more thorough tidy. This involves wiping down the desk, putting away any stray tools, and assessing if any storage solutions need adjusting.
* **Declutter Regularly:** Every few months, I dedicate an hour to decluttering. This is where I’ll assess if I’m still using certain supplies or if items have become duplicates.
* **Label Everything:** Labeling drawers and boxes is a game-changer. It forces you to think about where things belong and makes it easy to put them away quickly.
Mistakes That Make This Fail
Even with a seemingly perfect system, there are common pitfalls.
* **Overbuying:** The temptation at Ikea is real! Stick to your measured plan. It’s better to buy a few more storage boxes later than to have unusable items.
* **Not Securing Tall Units (if applicable):** For the Kallax units, especially the taller ones, not using the anti-tip hardware is a major safety hazard.
* **Ignoring Drawer Runners:** Not ensuring drawer runners are perfectly level will lead to sticky, annoying drawers that hinder your workflow.
* **Procrastinating on Tidying:** Letting clutter build up is the fastest way to make your beautiful craft room feel overwhelming and unusable.
* **Forgetting About Workflow:** Arranging units purely for aesthetics without considering how you’ll actually use the space will lead to frustration.
My Ikea Kallax and Alex craft room journey has been incredibly rewarding. It’s a space that adapts with me as my crafting evolves, and with a little planning and ongoing effort, it remains my organized haven.
Conclusion
Designing a dedicated Ikea Kallax and Alex craft room has truly transformed my creative process. The difference it makes day to day, with everything having its place, is immense. It’s no longer a hunt for supplies; it’s pure inspiration! If you’re feeling overwhelmed, your smallest first step today could be simply clearing one shelf or drawer. Remember, this approach can be adapted! For a different room, perhaps consider a minimalist approach with affordable cube storage in your entryway. On a tighter budget, repurposing old crates or baskets can achieve fantastic organization for your crafting space.
Explore More Ideas
Don’t stop here! There are so many ways to create an organized and inspiring home.
