Easy Pumpkin Coasters Crochet Patterns: 10+ Ideas
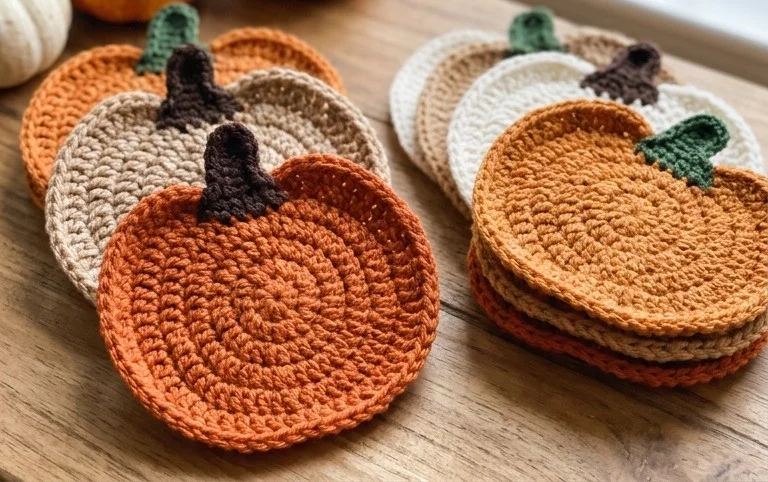
10+ Pumpkin Coasters Crochet Patterns are your ticket to a cozy, clutter-free autumn! Are you tired of those dreaded drink rings staining your beautiful wooden tables, or having a jumble of mugs and glasses precariously balanced, threatening to tip over? I know I’ve been there! Imagine, instead, your coffee table adorned with adorable, hand-stitched pumpkin coasters, each one a little burst of fall cheer. These charming creations are surprisingly quick to make, often taking just an hour or two and costing very little in yarn. In this collection, you’ll discover how to crochet a variety of pumpkin designs, from classic ribbed pumpkins to cute and quirky variations. We’ll cover simple stitches and techniques, making it accessible for beginners while offering fun new ideas for experienced crocheters. Get ready to add a touch of handmade warmth and practical elegance to your home this season!
Cozy Up Your Coffee Table: 10+ Pumpkin Coaster Crochet Patterns to Fall For
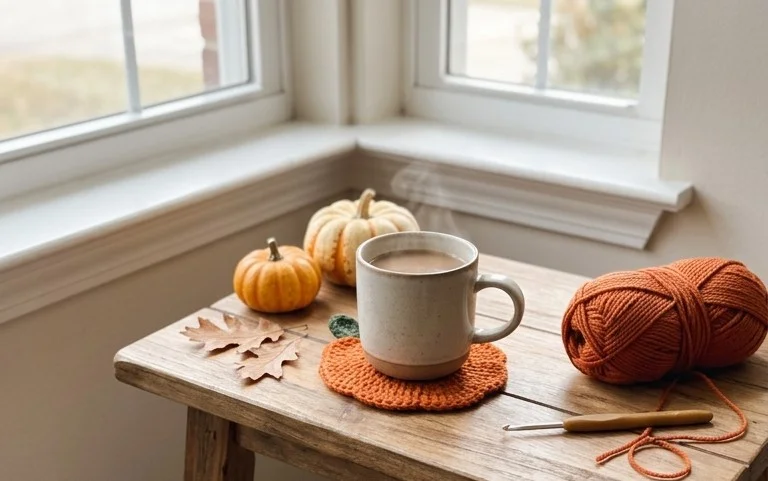
As the leaves begin to turn and a crispness fills the air, my thoughts naturally drift to all things cozy and autumnal. This year, I’m bringing that cozy feeling right to my coffee table with a delightful collection of pumpkin-themed crochet coasters. Not only do they add a charming seasonal touch, but they’re also incredibly practical, protecting my surfaces from condensation and spills. And the best part? They’re surprisingly easy and quick to make! If you’re looking for a way to inject some handmade warmth into your home decor this fall, these pumpkin coasters are an absolute must-try.
Getting Started: What You’ll Need and a Rough Cost Breakdown
Before we dive into the enchanting world of crochet pumpkins, let’s talk about the essentials. The beauty of crochet projects like these is their affordability and accessibility.
For a typical pumpkin coaster pattern, you’ll likely need:
* **Yarn:** Worsted weight acrylic yarn is my go-to for coasters. It’s durable, washable, and comes in a fantastic array of colors. For about 10-15 coasters, you might need 1-2 skeins of your main pumpkin color (think oranges, deep reds, yellows) and a small amount of green or brown for stems and leaves. A typical 4oz (113g) skein of acrylic yarn costs anywhere from $3 to $7. So, for yarn alone, you’re looking at a rough cost of $6 to $14.
* **Crochet Hook:** A hook size that complements your yarn weight is crucial. For worsted weight yarn, a 5mm (H/8) or 5.5mm (I/9) hook is usually perfect. If you don’t have one, a basic hook can cost around $3 to $5.
* **Tapestry Needle:** Essential for weaving in those pesky ends! A pack of a few tapestry needles usually costs around $2 to $4.
* **Scissors:** Any sharp pair will do.
Let’s say you’re making a set of 6 coasters. With 1.5 skeins of yarn (totaling around $8), a hook ($4), and a tapestry needle ($3), your initial investment for materials to make *many* more than one set would be approximately $15. This makes crochet coasters an incredibly budget-friendly decorating option.
Measure Twice, Crochet Once: Planning Your Pumpkin Patch
Even for small projects like coasters, a little planning goes a long way.
* **Coaster Size:** Most pumpkin coaster patterns result in a coaster around 4-5 inches (10-13 cm) in diameter. This is a great size for most mugs and glasses. Before you begin, consider the size of your typical drinkware. If you often use oversized mugs, you might want to add a few extra rounds to your pattern.
* **Stitch Count:** The number of stitches in your starting ring and subsequent rounds will determine the final size. Patterns usually specify this, but it’s good to have a general idea. If you want a slightly smaller coaster, simply work fewer rounds. If you need it bigger, add more rounds.
* **Color Palette:** Think about your existing home decor. Do you have a lot of warm tones? Consider terracotta oranges, deep burgundies, or even a creamy ivory for a more muted look. If your space is more neutral, a bright, cheerful pumpkin orange will pop beautifully. Don’t forget a contrasting color for the stem – a natural green or a rich brown works wonderfully.
The Pumpkin Coaster Crochet Process: A Step-by-Step Guide
While there are many variations of pumpkin coaster patterns, most follow a similar, simple construction. Here’s a general walkthrough based on a common design:
1. **Magic Ring/Chain and Stitch:** You’ll usually start with a magic ring (a technique that creates a tight, adjustable circle) or by chaining a few stitches and joining to form a small ring.
2. **Round 1: Building the Base:** This round typically involves working a set number of single crochet (sc) or half double crochet (hdc) stitches into the ring. For example, you might work 8 sc stitches into the magic ring.
3. **Round 2: Increasing to Create the Circle:** This is where you’ll start to create a flat circle. You’ll typically work two stitches into each stitch from the previous round. So, if you had 8 stitches in Round 1, you’d work 2 sc into each of those 8 stitches, giving you 16 stitches.
4. **Subsequent Rounds: Increasing Evenly:** For subsequent rounds, you’ll continue to increase stitches, but in a way that keeps the circle flat and prevents it from ruffling or cupping. A common increase pattern is to work one stitch, then two stitches in the next, then one stitch, then two stitches, and so on. Most patterns will clearly outline the stitch count for each round to achieve a flat circle. You’ll continue this until your coaster reaches your desired diameter (usually around 4-5 inches).
5. **Optional Round: Edging (Optional):** Some patterns include a final round of a different stitch, like a slip stitch (sl st) or a contrasting color for a more defined edge. This is purely aesthetic.
6. **Adding the Stem:** Once your main pumpkin circle is complete, you’ll attach yarn in a complementary color (green or brown) to the top center of the coaster. You’ll then crochet a small, short section of stitches (usually single crochet) to create a little stem. This might be just 3-5 rounds of about 4-6 stitches.
7. **Adding a Leaf (Optional):** Many patterns include instructions for a small crochet leaf to attach to the stem. This is usually worked by chaining a few stitches and then working stitches back down the chain to create a leaf shape.
8. **Finishing Off:** Cut your yarn, leaving a tail of about 6 inches. Pull this tail through the last loop on your hook to secure the knot. Thread the tail onto your tapestry needle and weave it securely through the stitches on the wrong side of your coaster. Do the same for any other yarn tails from changing colors or starting/ending. Trim any excess yarn.
Adapting for Small Spaces and Rentals: Decorating Without Damage
One of the fantastic things about crochet coasters is their inherent suitability for small spaces and rentals. They require absolutely no drilling or permanent attachments!
* **No-Drill Decor:** These coasters are purely decorative and functional. They sit on your existing surfaces, adding charm without altering them in any way.
* **Portability:** If you’re renting and need to pack up quickly, or if you’re moving to a smaller apartment, these are incredibly easy to store and transport. They take up minimal space and can be rolled up or stacked neatly.
* **Temporary Touches:** For seasonal decor, they’re perfect. You can bring them out for a few months and then pack them away without leaving a trace.
Styling Notes: Making Your Pumpkins Shine
Now for the fun part: styling your beautiful handmade pumpkin coasters!
* **Color Coordination:** As mentioned, choose colors that complement your existing decor. Don’t be afraid to experiment with non-traditional pumpkin colors like deep purple, muted mustard yellow, or even a creamy white for a sophisticated look.
* **Texture Play:** Mix and match different textures. If your coffee table is wood, the soft yarn of the coasters will create a lovely contrast. If you have a lot of smooth surfaces, a few textured coasters can add visual interest.
* **Placement is Key:**
* **Coffee Table Centerpiece:** Arrange a few coasters artfully on your coffee table. You can place them individually or group them together.
* **Underneath Vases/Candles:** Use them to protect your surfaces from the bases of decorative items like candle holders or small vases.
* **On Side Tables:** Don’t forget side tables! A single coaster with a cup of tea can add a welcoming touch.
* **Groupings:** Cluster 3-4 coasters together for a charming vignette. You can place a small seasonal decorative item, like a mini artificial pumpkin or a pinecone, in the center of the group.
* **What to Put Where:** Once in use, the coasters will naturally have drinks placed on them. This is their primary function! But even when empty, they add a decorative element. Consider placing a few on a tray with a stack of books and a small seasonal candle.
Keeping it Tidy: Post-Week One Maintenance
The beauty of acrylic yarn coasters is their washability.
* **Daily Quick Clean:** For minor spills or dust, a quick wipe with a damp cloth is usually all that’s needed.
* **Weekly Check:** Once a week, or as needed, check your coasters. If they’ve been used for drinks, you might notice water rings or small spills.
* **Machine Washable (Usually):** Most acrylic yarn coasters can be tossed into a washing machine on a gentle cycle with cold water. Place them in a mesh laundry bag to prevent them from getting snagged.
* **Air Dry:** It’s best to air dry your coasters. Lay them flat on a towel or hang them to dry. Avoid the dryer, as excessive heat can damage acrylic fibers.
* **Weaving in Ends:** If any ends have started to peek out, it’s a good time to re-weave them with your tapestry needle.
Mistakes That Make These Fail: Avoiding the Pitfalls
While these projects are generally forgiving, there are a few common mistakes that can lead to less-than-perfect results.
* **Incorrect Gauge:** If your tension is too loose or too tight, your coasters might end up much larger or smaller than intended, or they might not lie flat. It’s always a good idea to make a small test swatch (even just a few rows) to ensure your stitches are consistent.
* **Uneven Increases:** The most common reason for a coaster not lying flat is uneven stitch increases in the increasing rounds. Carefully count your stitches at the end of each round to ensure you’re following the pattern exactly. If you see it starting to cup, you’ve likely missed some increases. If it’s ruffling, you’ve likely added too many.
* **Skipping the Stem:** While optional, the stem really completes the pumpkin look. Don’t skip this step if you want that iconic pumpkin shape!
* **Not Weaving in Ends Securely:** Loose ends can unravel your hard work. Take the time to thoroughly weave in all your yarn tails.
* **Over-Stuffing with Yarn (for some patterns):** Some specific pumpkin patterns might involve stuffing for a 3D effect. If you’re using one of these, over-stuffing can make the coaster stiff and less functional. Follow the pattern’s stuffing recommendations closely.
Embrace the joy of crafting this fall, and let these charming crochet pumpkin coasters add a touch of handmade magic to your home! Happy crocheting!
Conclusion
Who knew a few crocheted rounds could bring so much warmth and charm to your home? These adorable pumpkin coasters are more than just cute accessories; they’re little touches that make your day-to-day feel special, protecting your surfaces and adding a festive flair with every sip. Don’t let another cozy moment pass by without them!
Ready to start crafting your own bit of autumnal magic? The smallest possible first step is to simply pick one pattern that catches your eye and gather your yarn. You can have your very first pumpkin coaster ready to use by tonight!
Variations to Inspire:
For a touch of cozy in your bedroom, try smaller pumpkin coasters in muted creams or gentle blues. If you’re on a tighter budget, consider using scrap yarn for a colorful and eclectic collection that will brighten any corner.
We hope these pumpkin coasters crochet patterns have inspired you to bring a little extra handmade happiness into your home. Keep exploring our site for even more delightful decor and organization ideas!